This article is deprecated. For the most recent version, refer to the Avascan Knowledge Base.
Introduction: X-Chain and P-Chain
The X-Chain acts as a decentralized platform for creating and trading smart digital assets. (Think X for eXchanging assets).
Another chain inherent to the Avalanche network is the P-Chain, which manages metadata about the Avalanche network. (P stands for platform).
As an AVAX presale participant, you will receive your tokens in your P address (option A1, option A2) or X-Chain address (Option B).
An X address is an address created on X-Chain, the main asset chain on the Avalanche network. Tokens held in X addresses are liquid, meaning that they can be freely transferred to other X addresses and to P addresses.
P addresses are addresses created on P-Chain, the platform chain on the Avalanche network. Tokens held in P addresses may be illiquid, meaning that you may not be able to move those tokens freely to your X address. You also cannot move your tokens from one P address to another directly, but you need to transfer the tokens to an X address first.
AVAX held in P addresses may be vested (locked) (from the genesis allocation on mainnet) or staked (via validation with a full node, or delegation).
This guide will help you get through the delegation of your AVAX tokens to a validator, helping you choose which is best for you.
Access your web wallet
The first step is to, obviously, access your AVAX Wallet. You can access it from here. If you haven’t created one already, you can follow the step-by-step creation by clicking on the ‘CREATE NEW WALLET’ button.
Transfer to P
Notice: most users have received 90% of AVAX purchased in the P address. if you’re one of them and you want to only delegate your locked AVAX, you can simply skip this step. If you also want to delegate your unlocked AVAX, you can proceed here to transfer them to P as well.
To stake AVAX (by validating with your node or delegating another node in your place), you need to first transfer the amount of AVAX you want to stake to P-Chain.
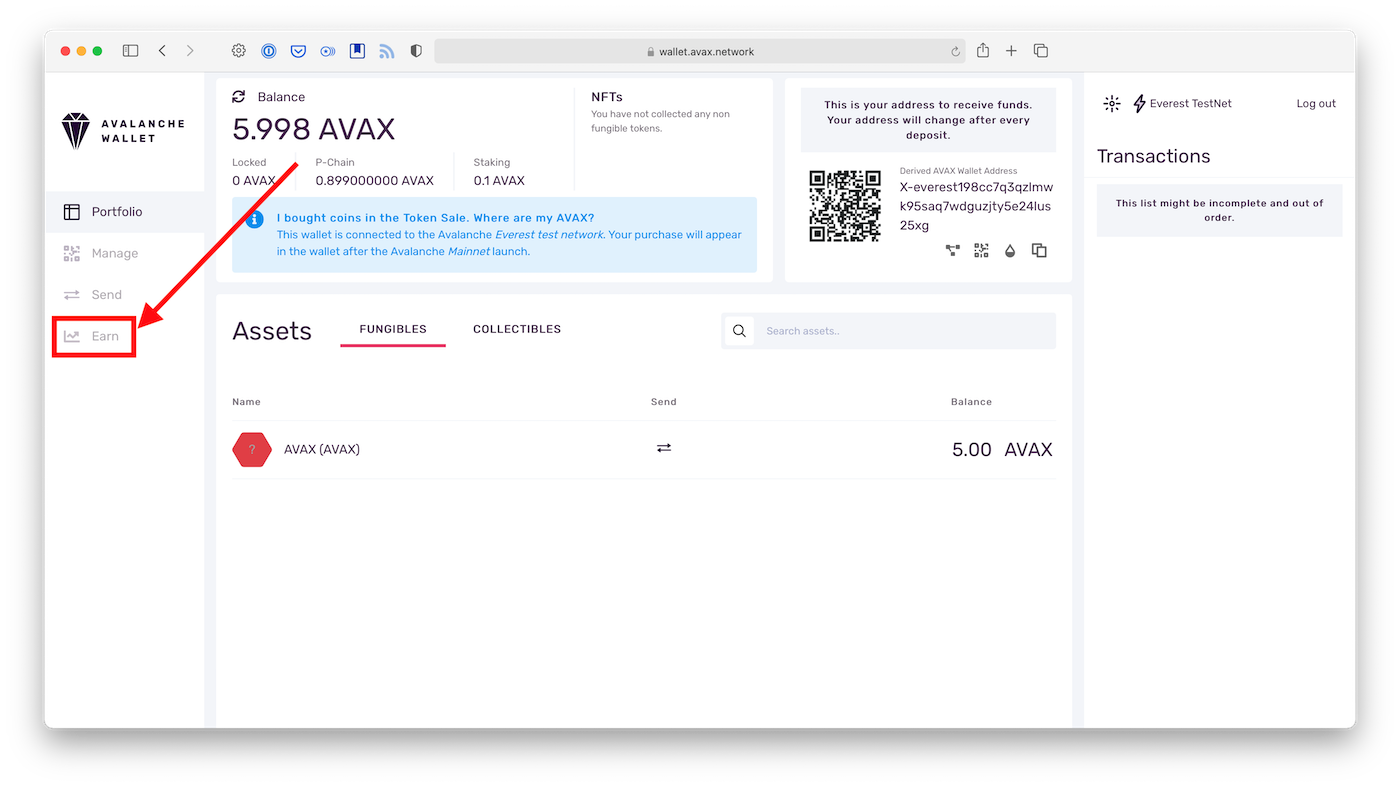
Click ‘Earn’ on the right sidebar, and then click the ‘TRANSFER’ button.
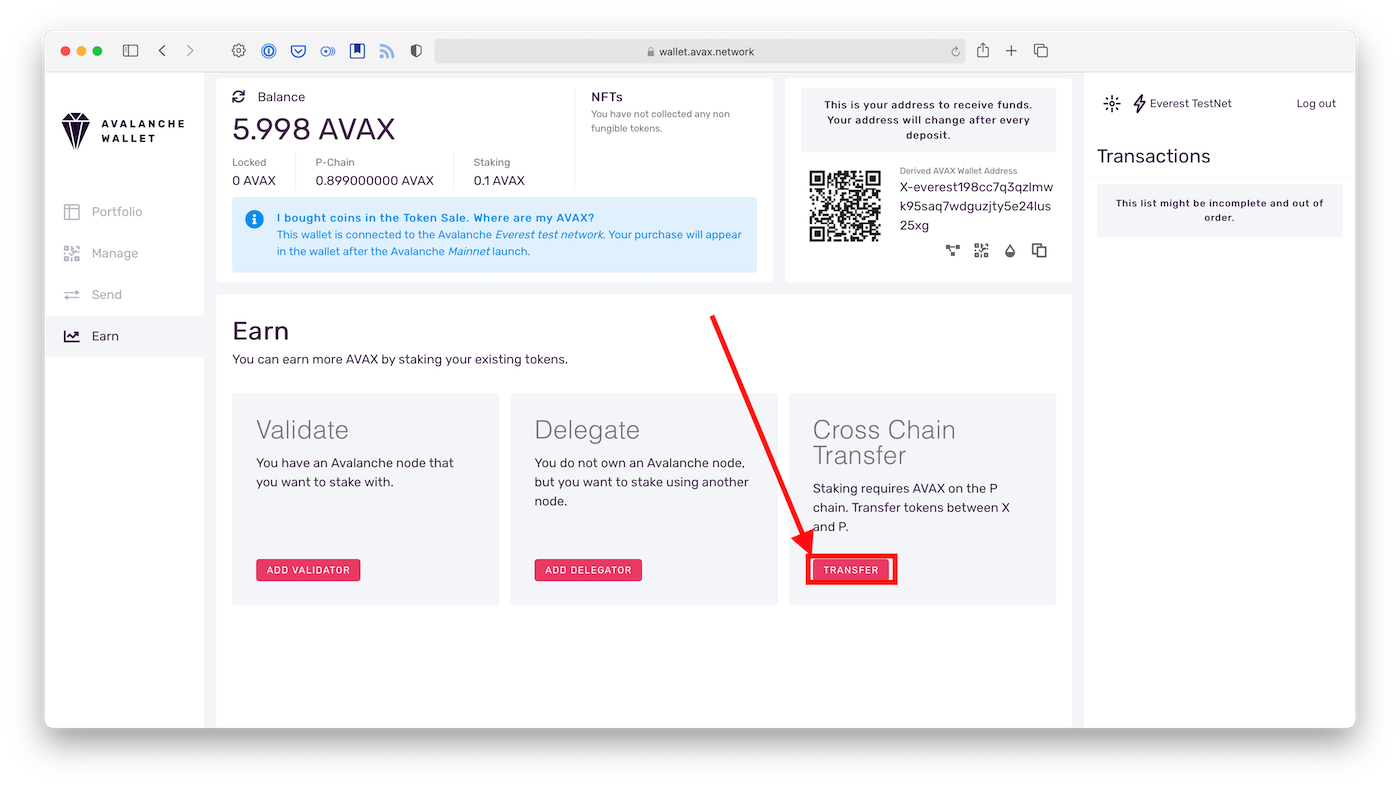
Make sure you transfer the amount you want to stake plus 0.002 AVAX, that is the fee that you will pay to do the transfer between the chains. Click again on ‘TRANSFER’ to confirm. And keep in mind that the minimum amount to stake in delegation is 25 AVAX, so make sure you transfer at least 25.002 AVAX from X to P.

Add delegation to a validator
Now that you have your AVAX in your P-Chain address, you’re ready to stake by delegating!
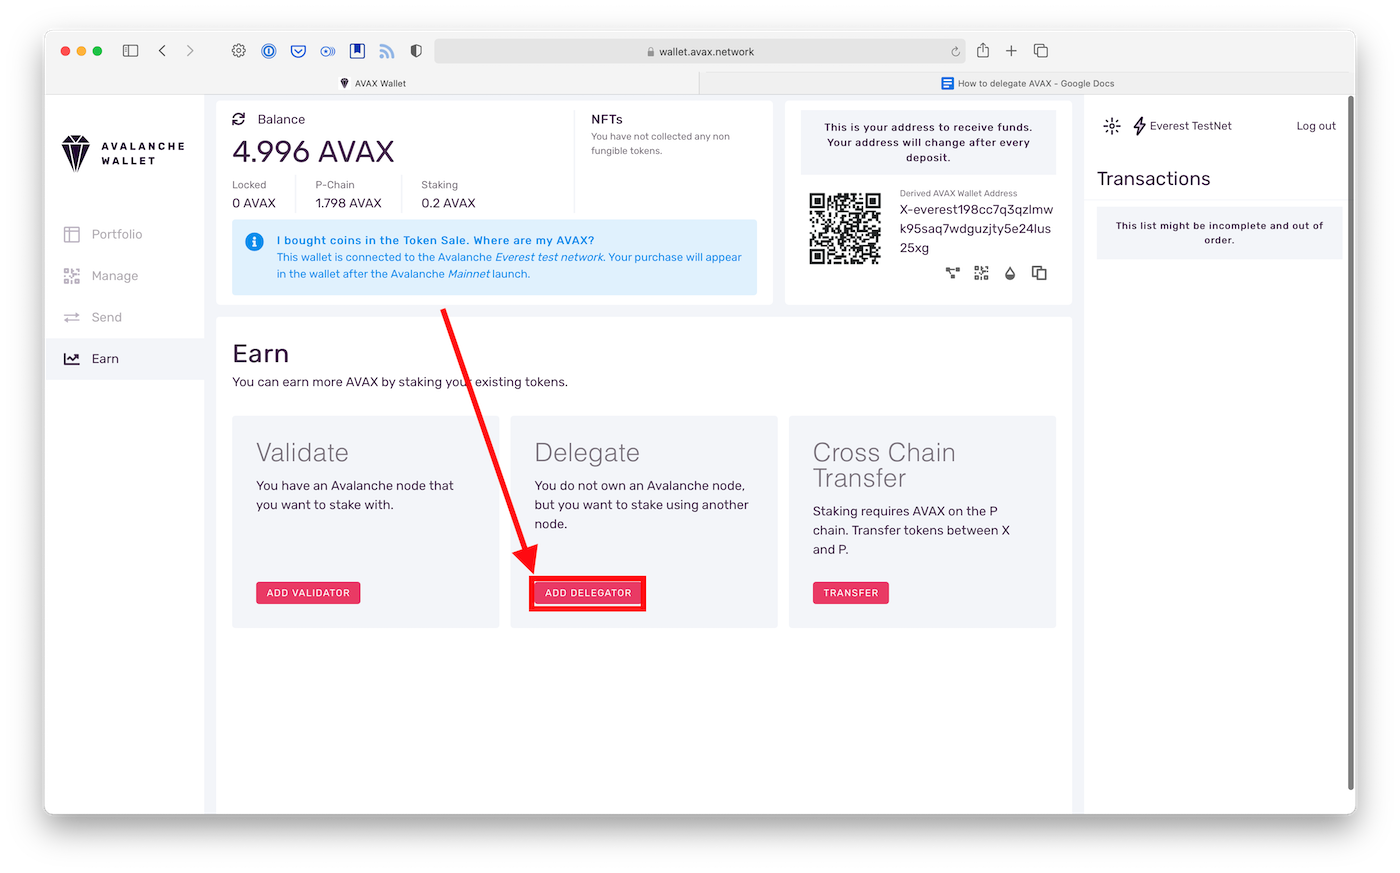
Return to the ‘Earn’ page, then click on ‘ADD DELEGATOR’.
You will be presented with a list of validators ordered by the total amount staked.
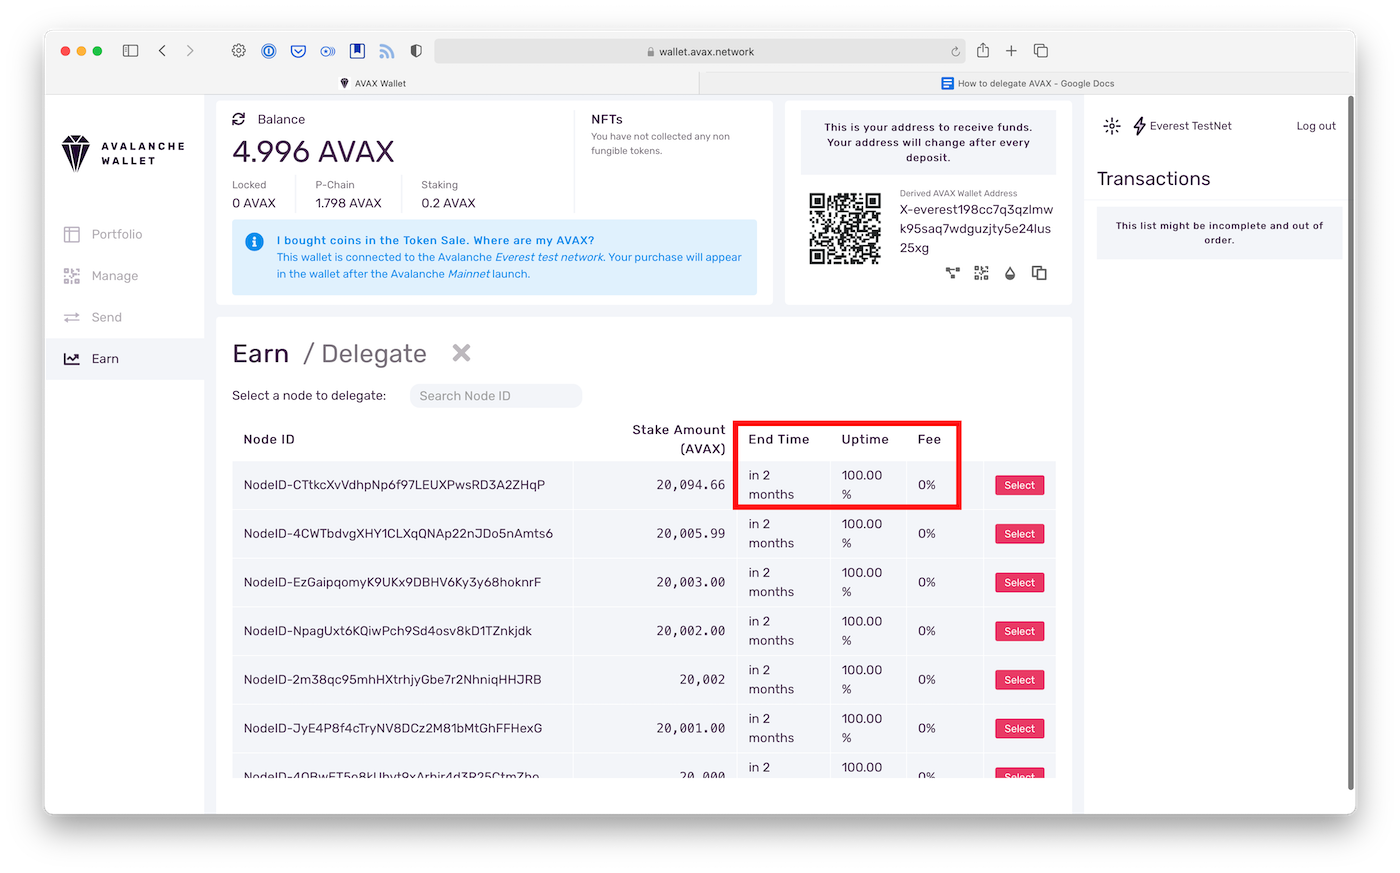
Select your validator
Delegate to Avascan!
We will be announcing our public node on Sunday, Sep. 20th! Join our Telegram chat to be the first to know.
Once you’ve chosen your validator, you can then ‘SELECT’ it.
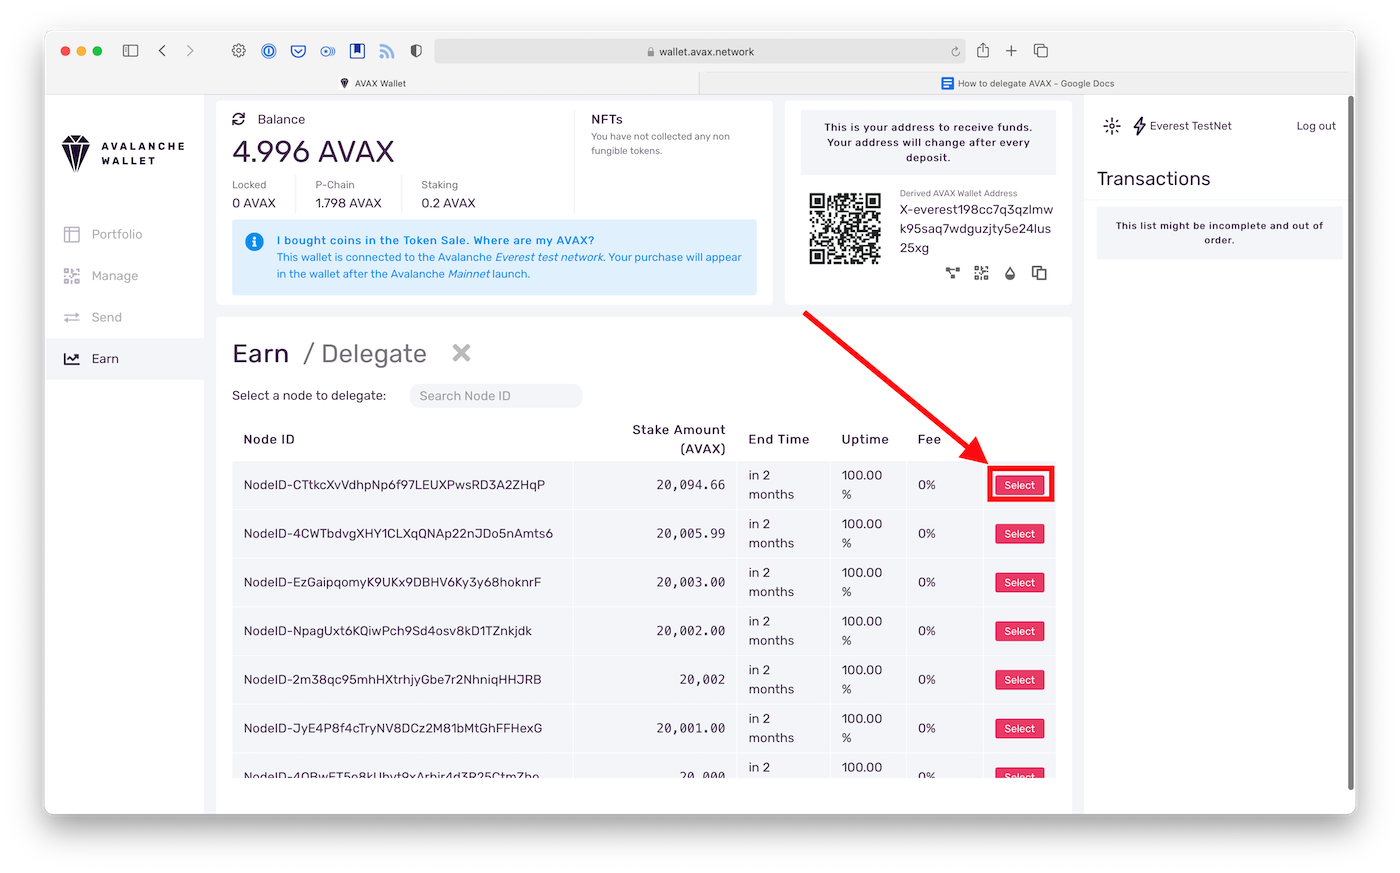
You’re then presented with the delegate page. You can choose the staking period (remember: you cannot stake longer that your validator’s), the amount that you want to delegate in stake and specify the reward address, if you don’t want to receive rewards on the same address from which you’re staking.
When you’ve entered all the information, you can just press ‘CONFIRM’ to confirm the data you input, and then ‘SUBMIT’ to confirm the delegation.
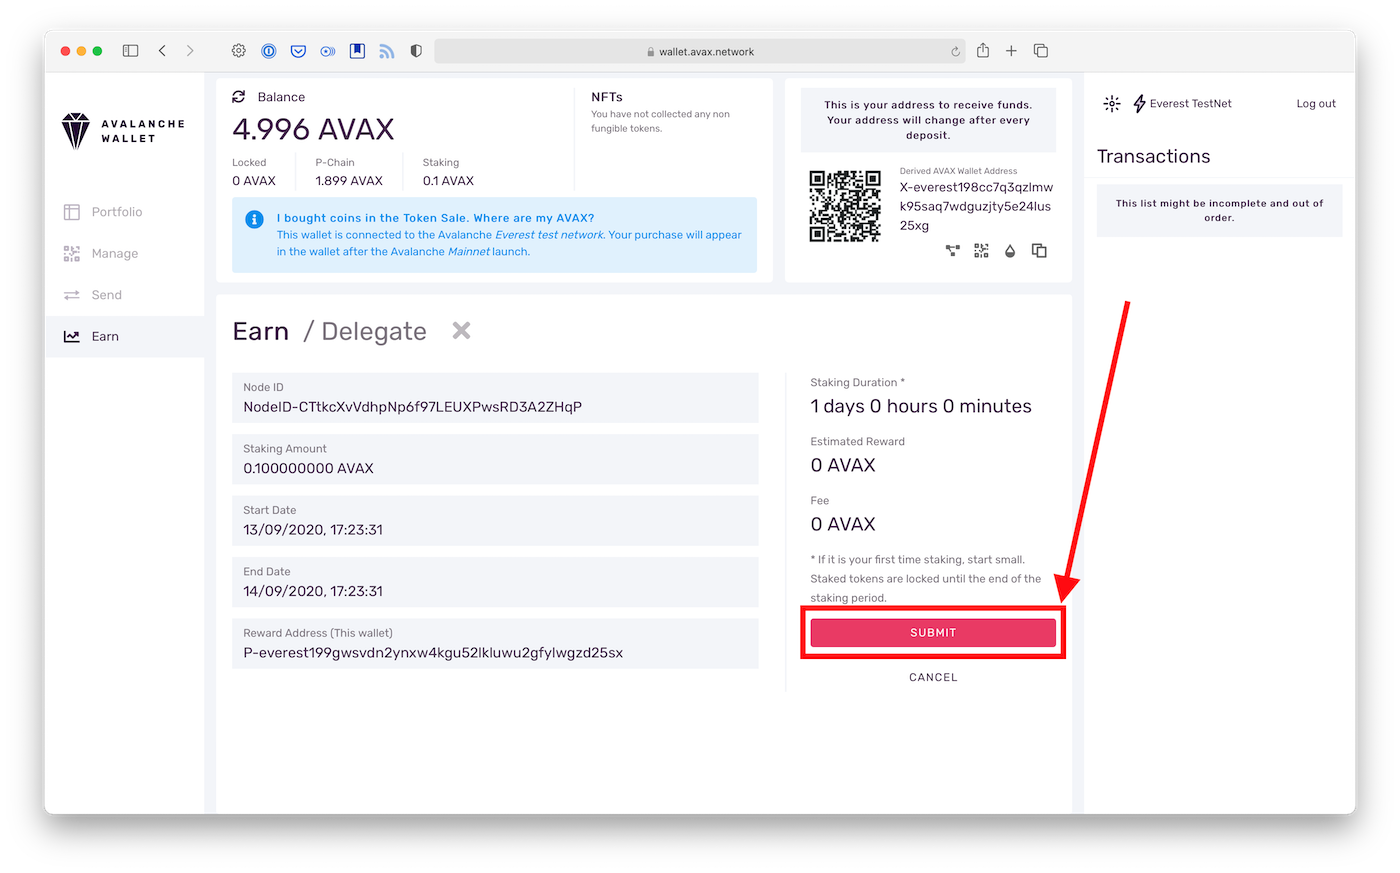
You’re all set, now you’re delegating!
Coming next
Get support
If you want to get continued support and want to know more about delegating and validating on the Avalanche network, join our Telegram chat.
